
WordPress is a popular blogging platform that allows users to create and manage their own blogs with ease. It has become the go-to solution for many people looking to publish content online with relative ease. However, running your own blog on your own server can be tricky and time-consuming; luckily, WPEngine offers reliable hosting solutions for bloggers. In this blog post, we will show you how to migrate an existing website to WPEngine.
WPEngine provides everything you need to run your blog without any hassle at all: Hosting, security software, automatic backups – the list goes on! In this article, we will cover why you should migrate an existing site over to WPEngine, as well as how it’s done.

Why should I choose WPEngine to host my website?
WPEngine’s hosting is superior to nearly all other web hosts for a few reasons. One of the most important factors when it comes to choosing a host, alongside price, duration, and reliability – is “uptime.” With WPEngine, you don’t have to worry about downtime at all! How often does your website go down?
Additionally, WPEngine’s hosting provides security software to keep your site safe from hackers and DDOS attacks. At the same time, providing a secure backup if anything goes wrong.
The last thing to consider when it comes to hosting is the price. WPEngine’s prices are on par with other hosts but come with more features and tools!
Migrating an Existing Site to WPEngine: How-to Guide
Now that we’ve covered some of the reasons you might want/need a new host, let’s talk about migrating your website over! This process is simple and can be done in just a few minutes:
How do I migrate my site?
It can be done easily by following these steps:
If you haven’t already, sign up for WPEngine. Pick the smallest plan; this can always be upgraded if needed.
Add a site
Add a new site (click on the Add Site button in the top right corner)
Create a unique name
Give the site a unique name

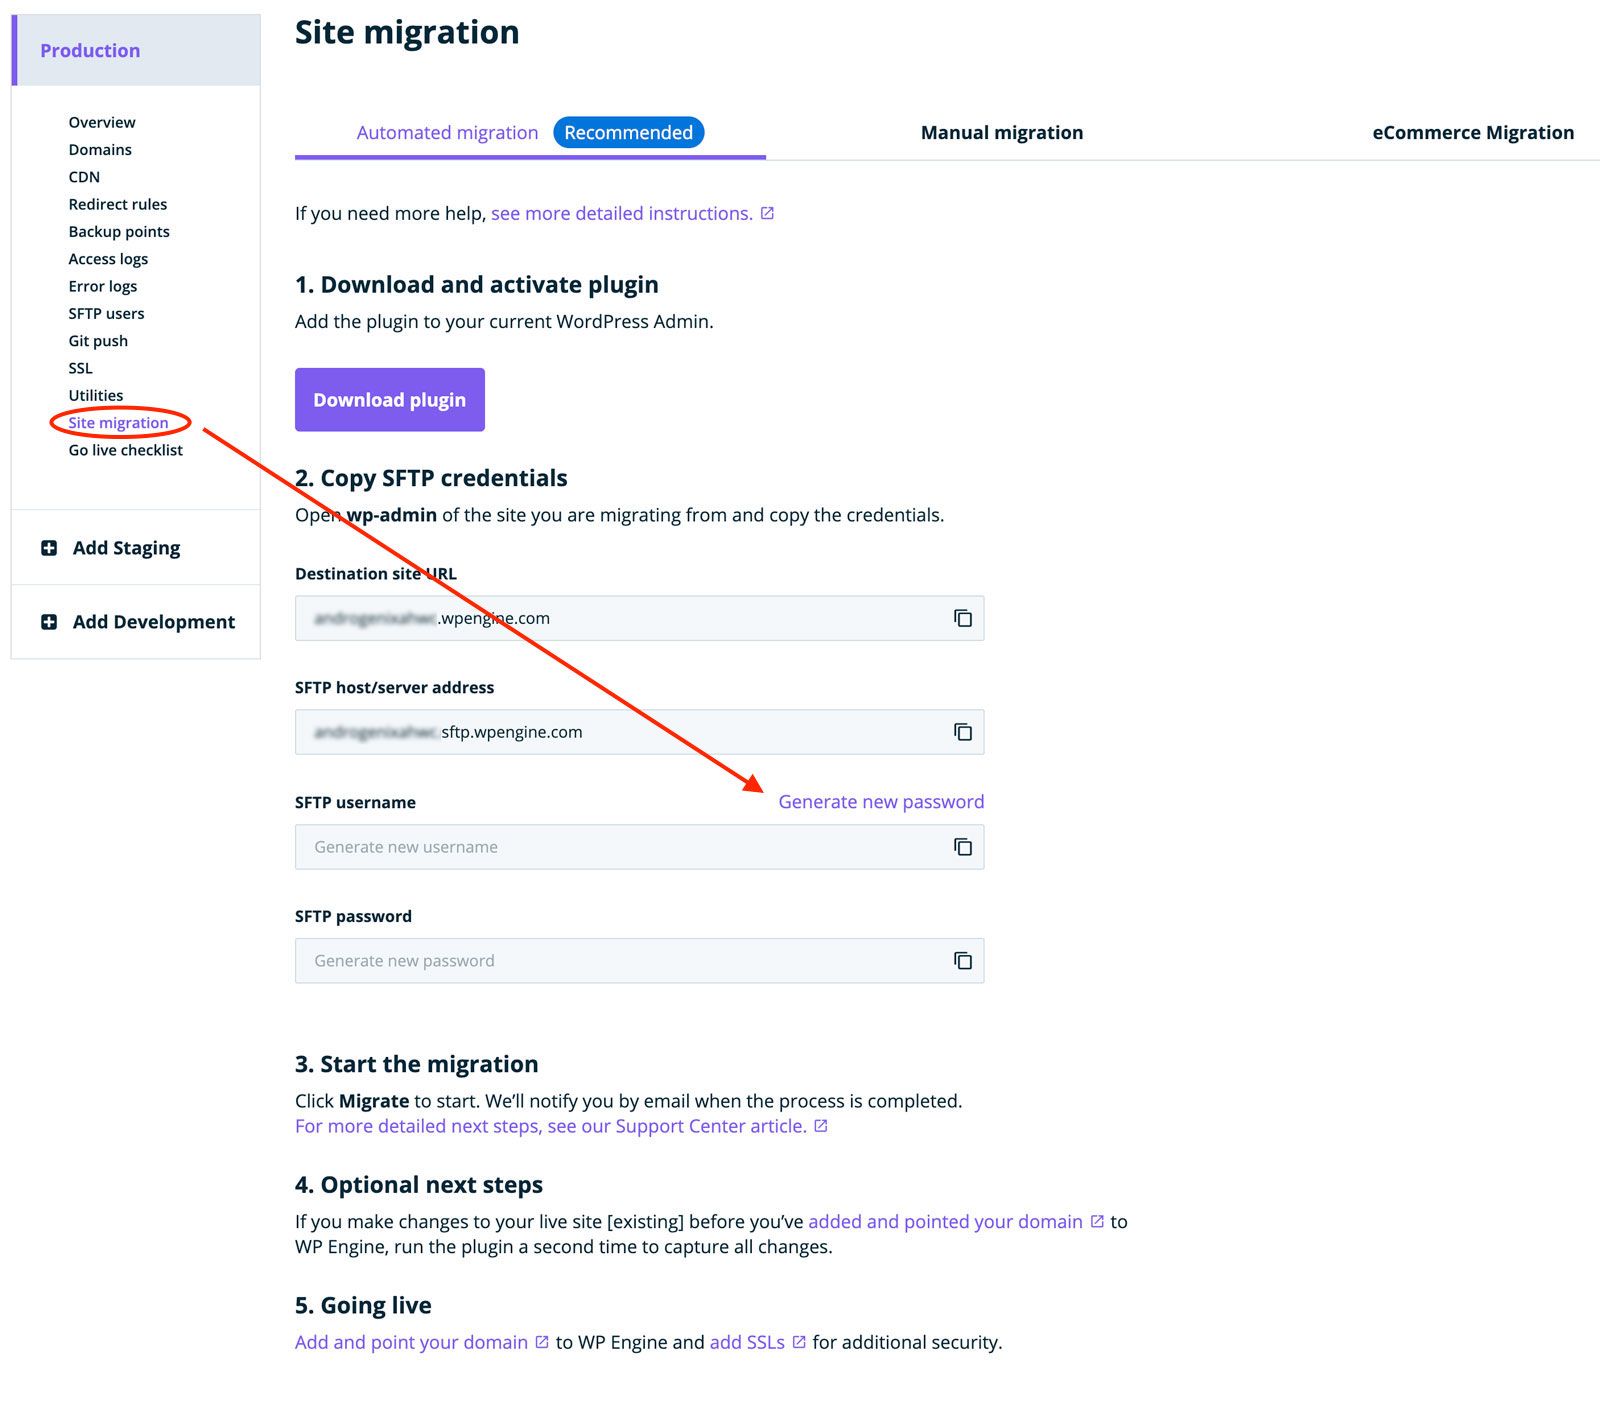
Site Migration Tab
Go to Site Migration under the Production Tab
Generate a Password
Click on Generate new password
Login to WordPress
Keeping that browser window open; Login to your current WordPress website.
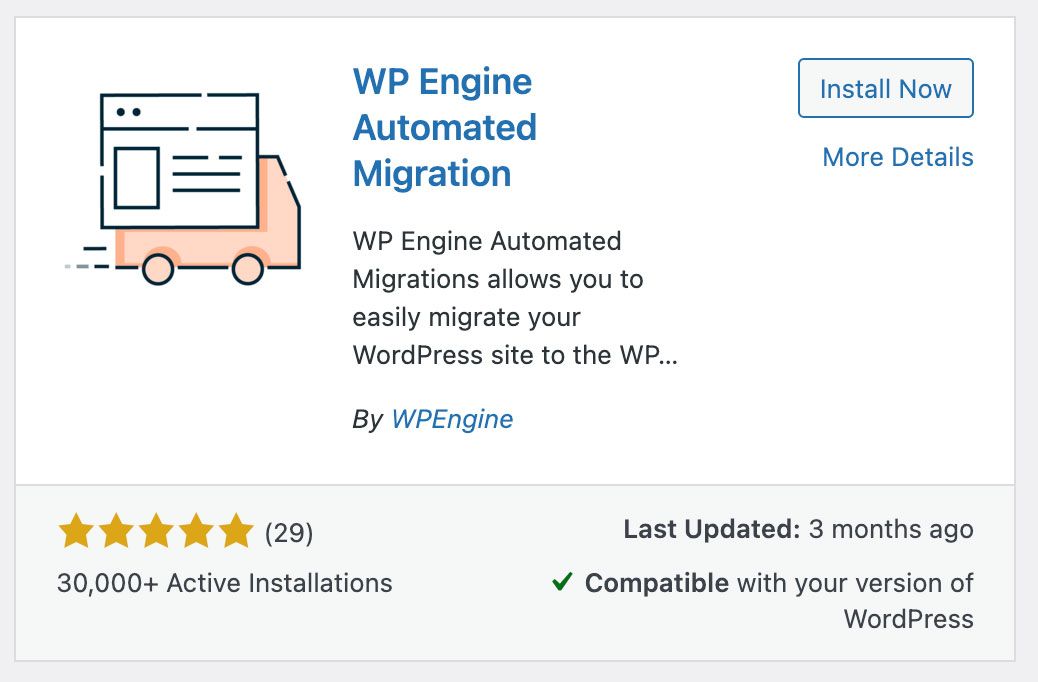
Install the WPE Plugin
Install & Activate the WP Engine Automated Migration plugin
Plugin Settings
Go to the plugin settings, add your email address (any email address will work, accept the terms and conditions. This email is used to notify you of the migration progress.)
Create sFTP credentials
Copy and paste the settings from WPEngine’s SFTP credentials page.
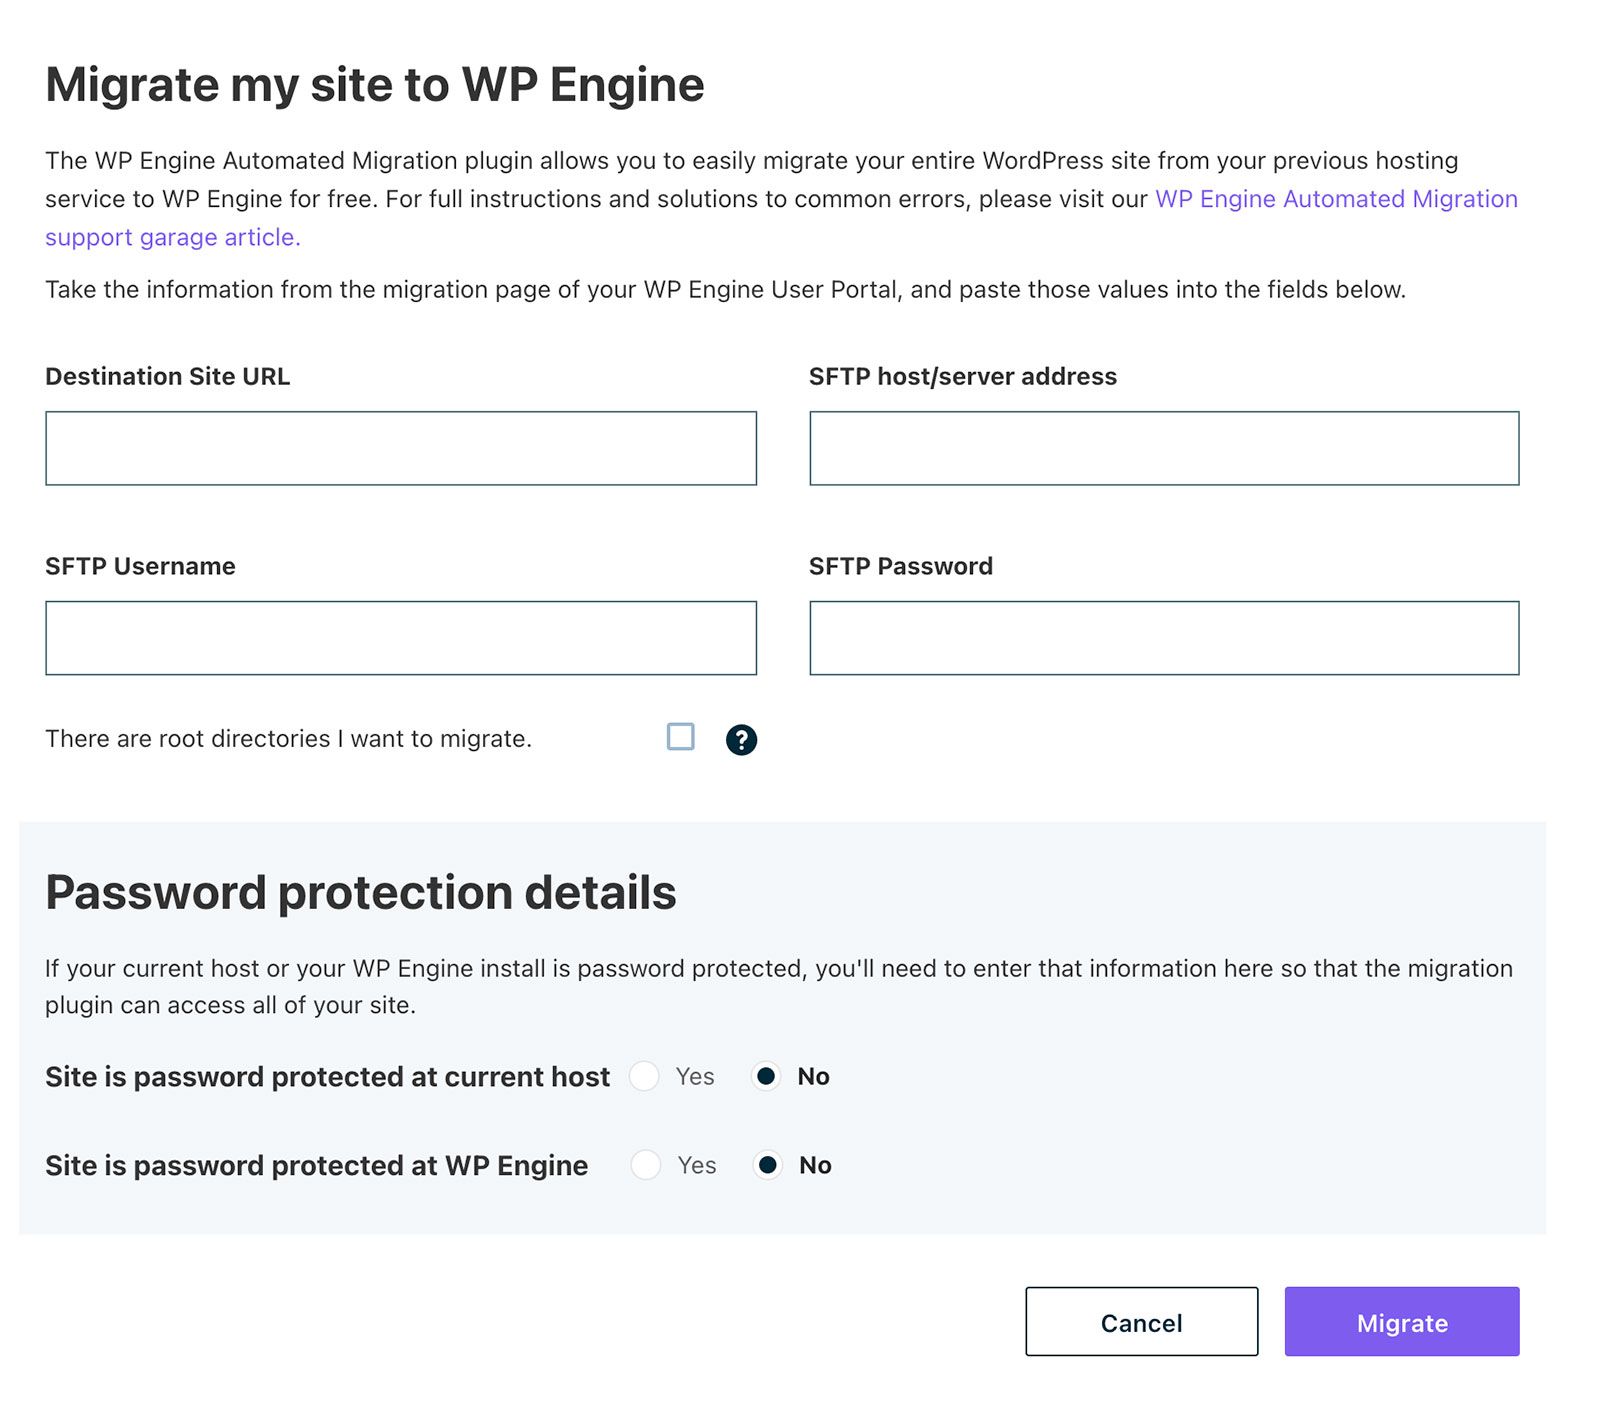
Migrate
Press the Migrate button
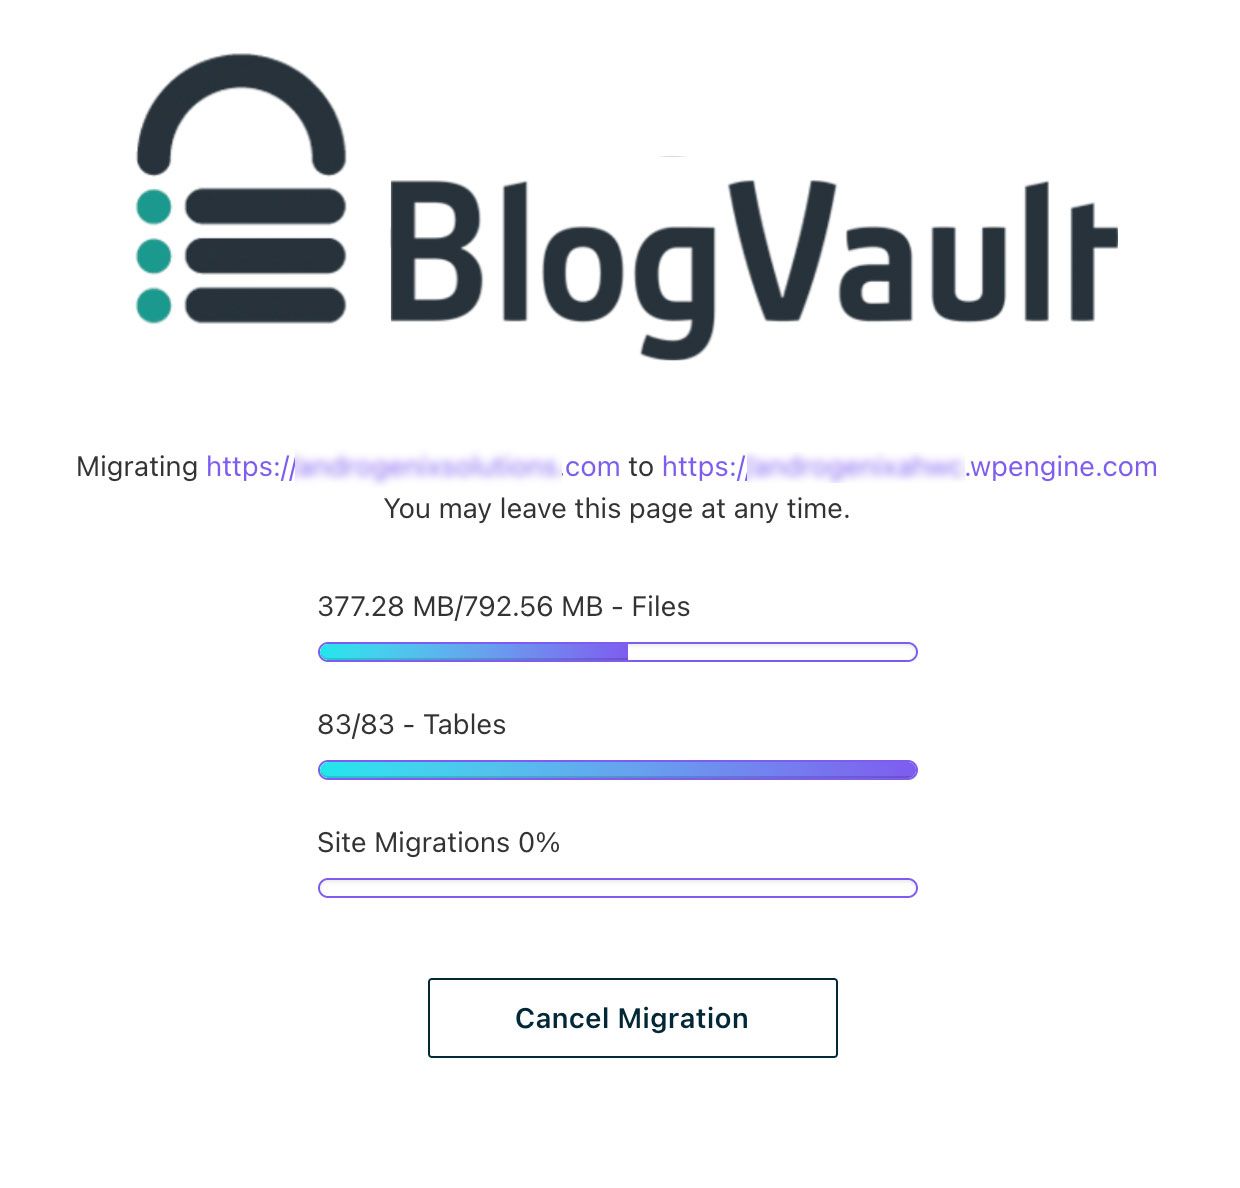
Transfer Files
Wait for the migration progress to finish. You will receive an email when complete. This could take minutes, or hours, depending on the size and speed of your current website/hosting.
Copy IP Settings
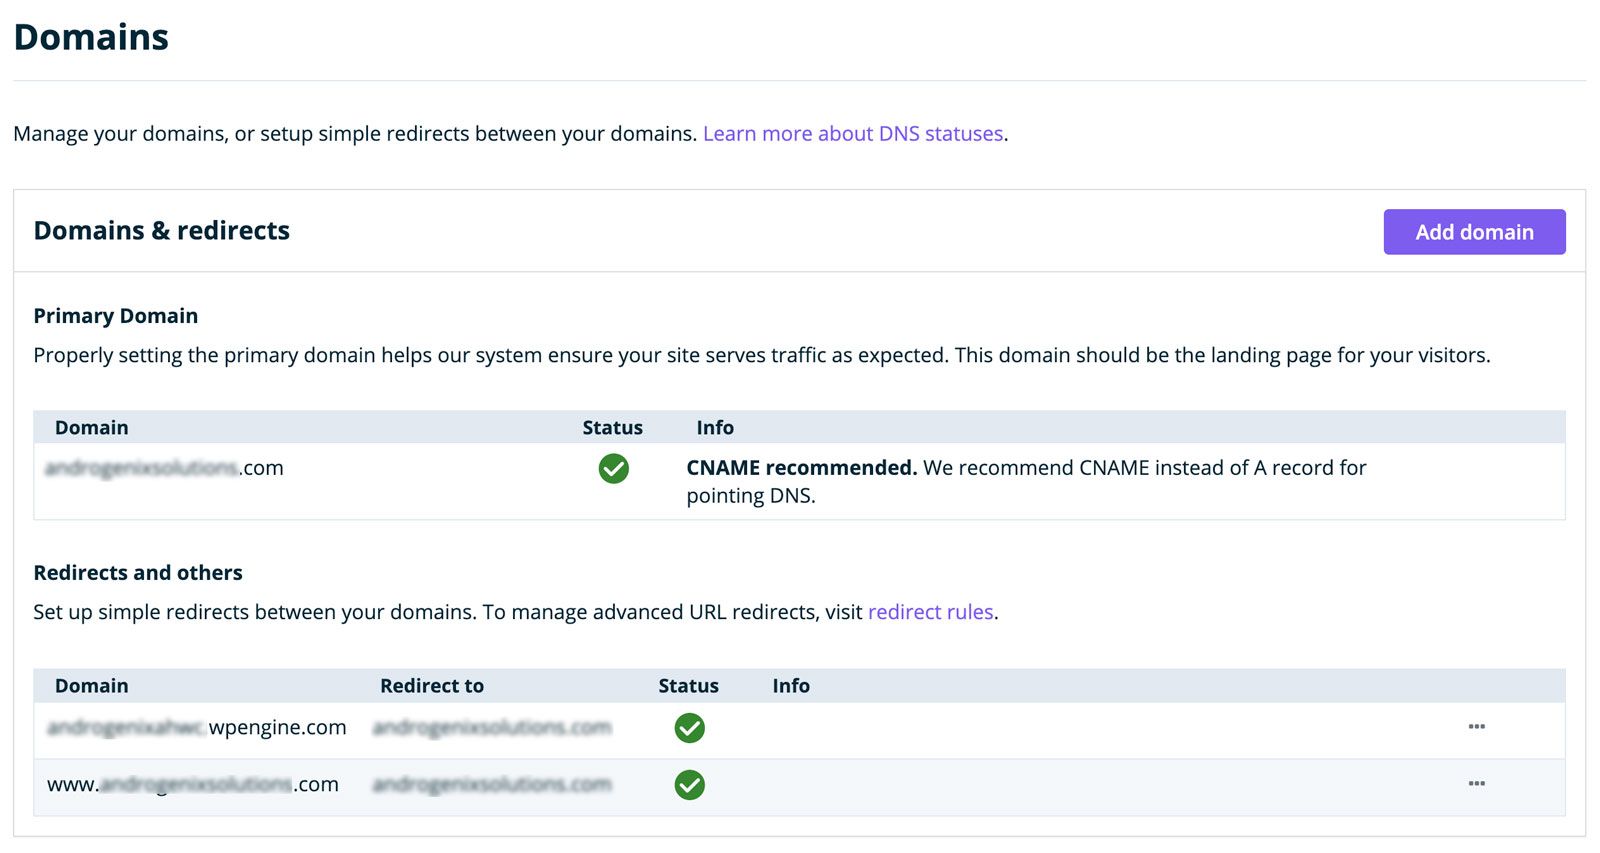
Copy your server’s IP address. This can be located under the Domains tab.
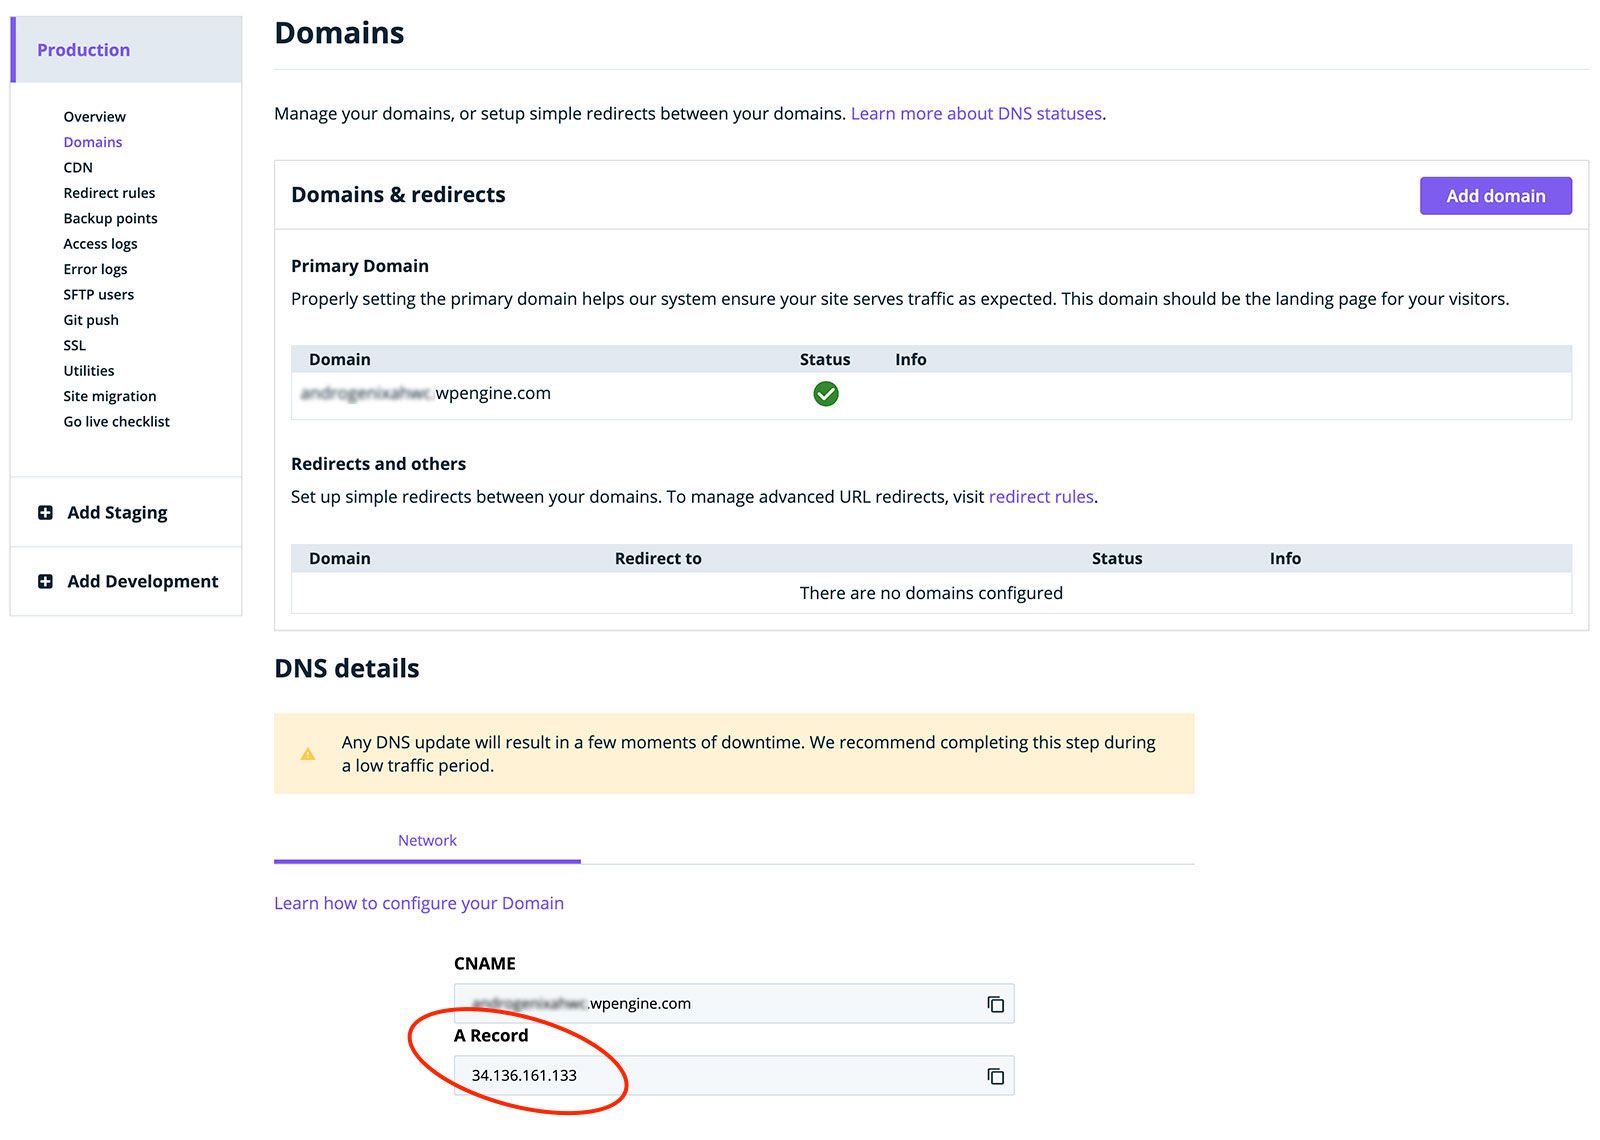
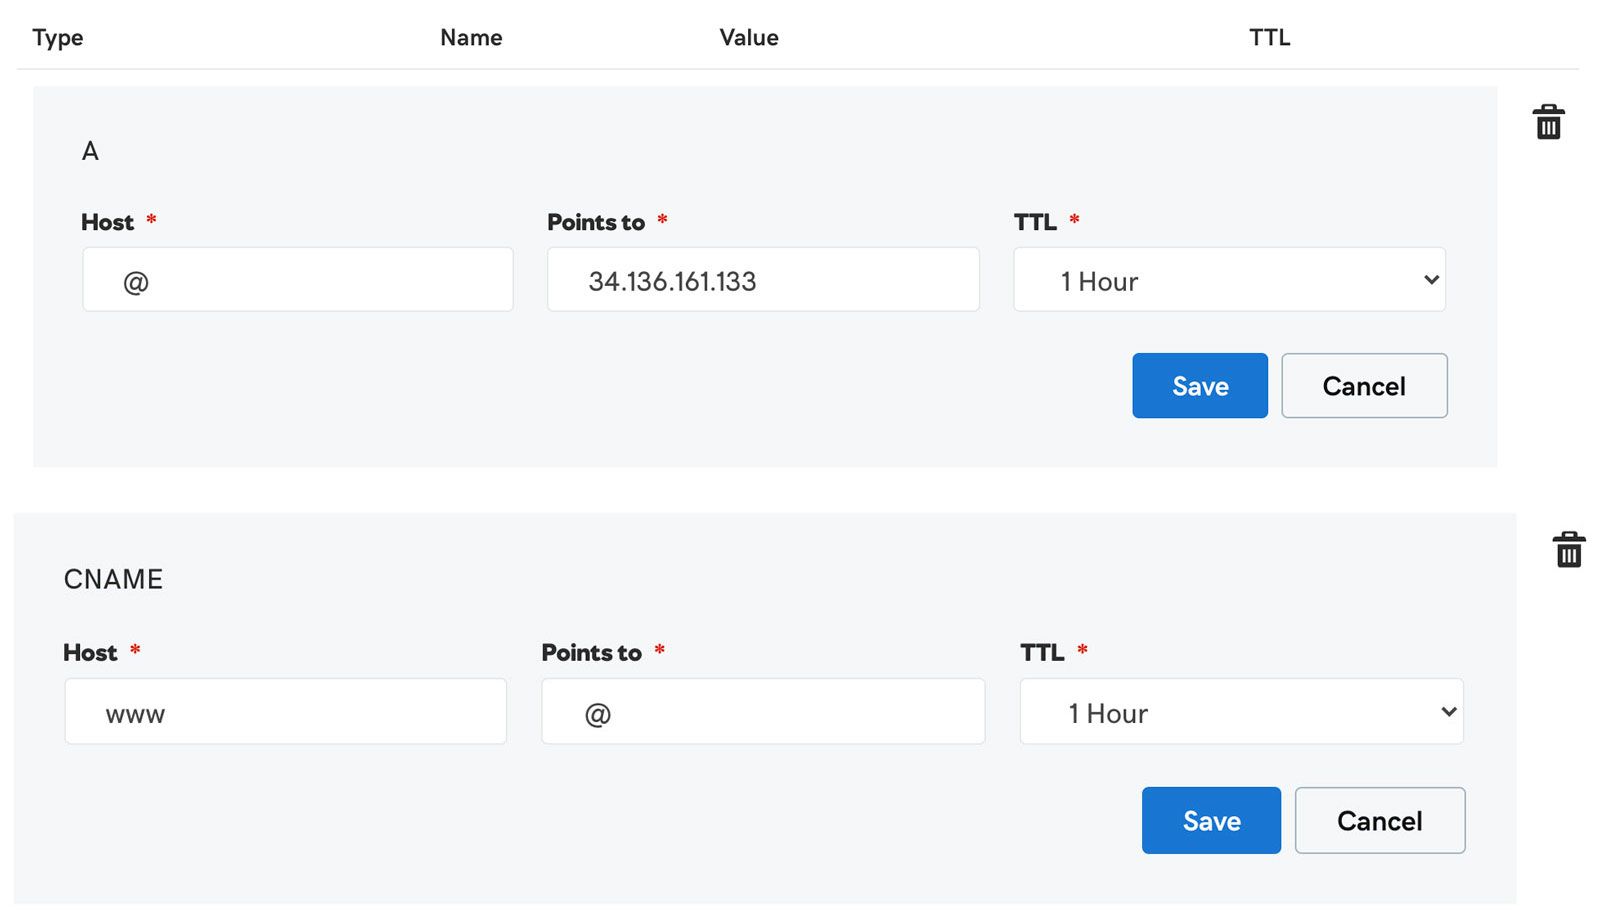
Update DNS
Login to your DNS provider (e.g., GoDaddy, Namecheap, Hover, etc…) and add the A Record to your DNS provider found under the domains tab in WPEngine.
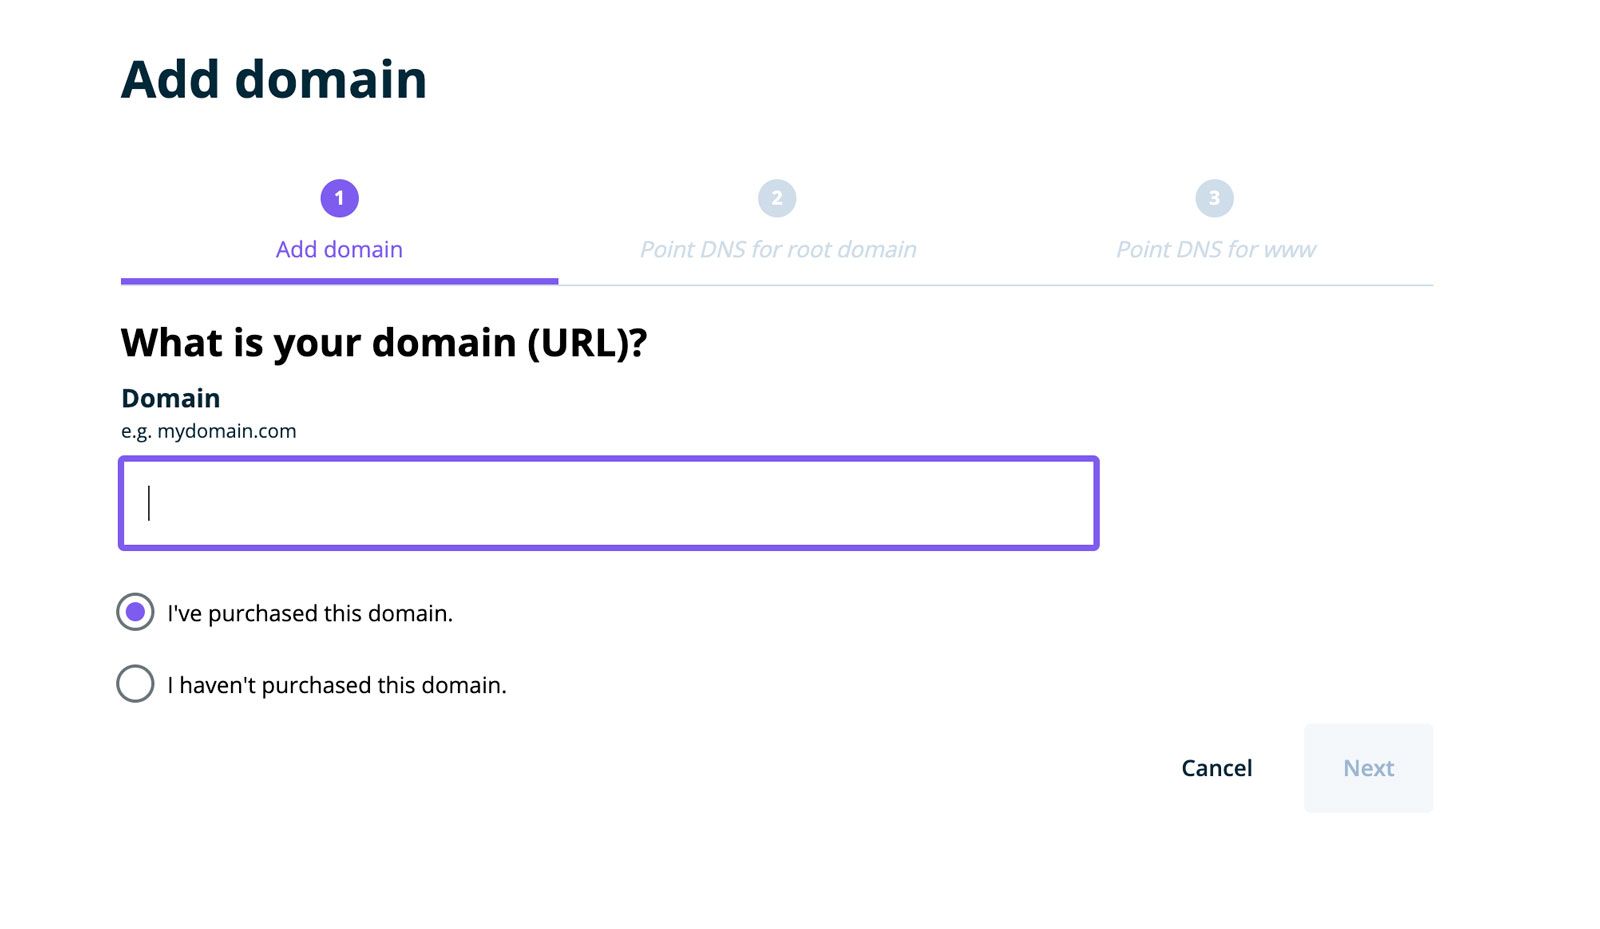
Add domain
Add your domain name to WPEngine.
Enable SSL
Select to add a free SSL certificate with LetsEncrypt
Test the site
Check that the website is up and running smoothly
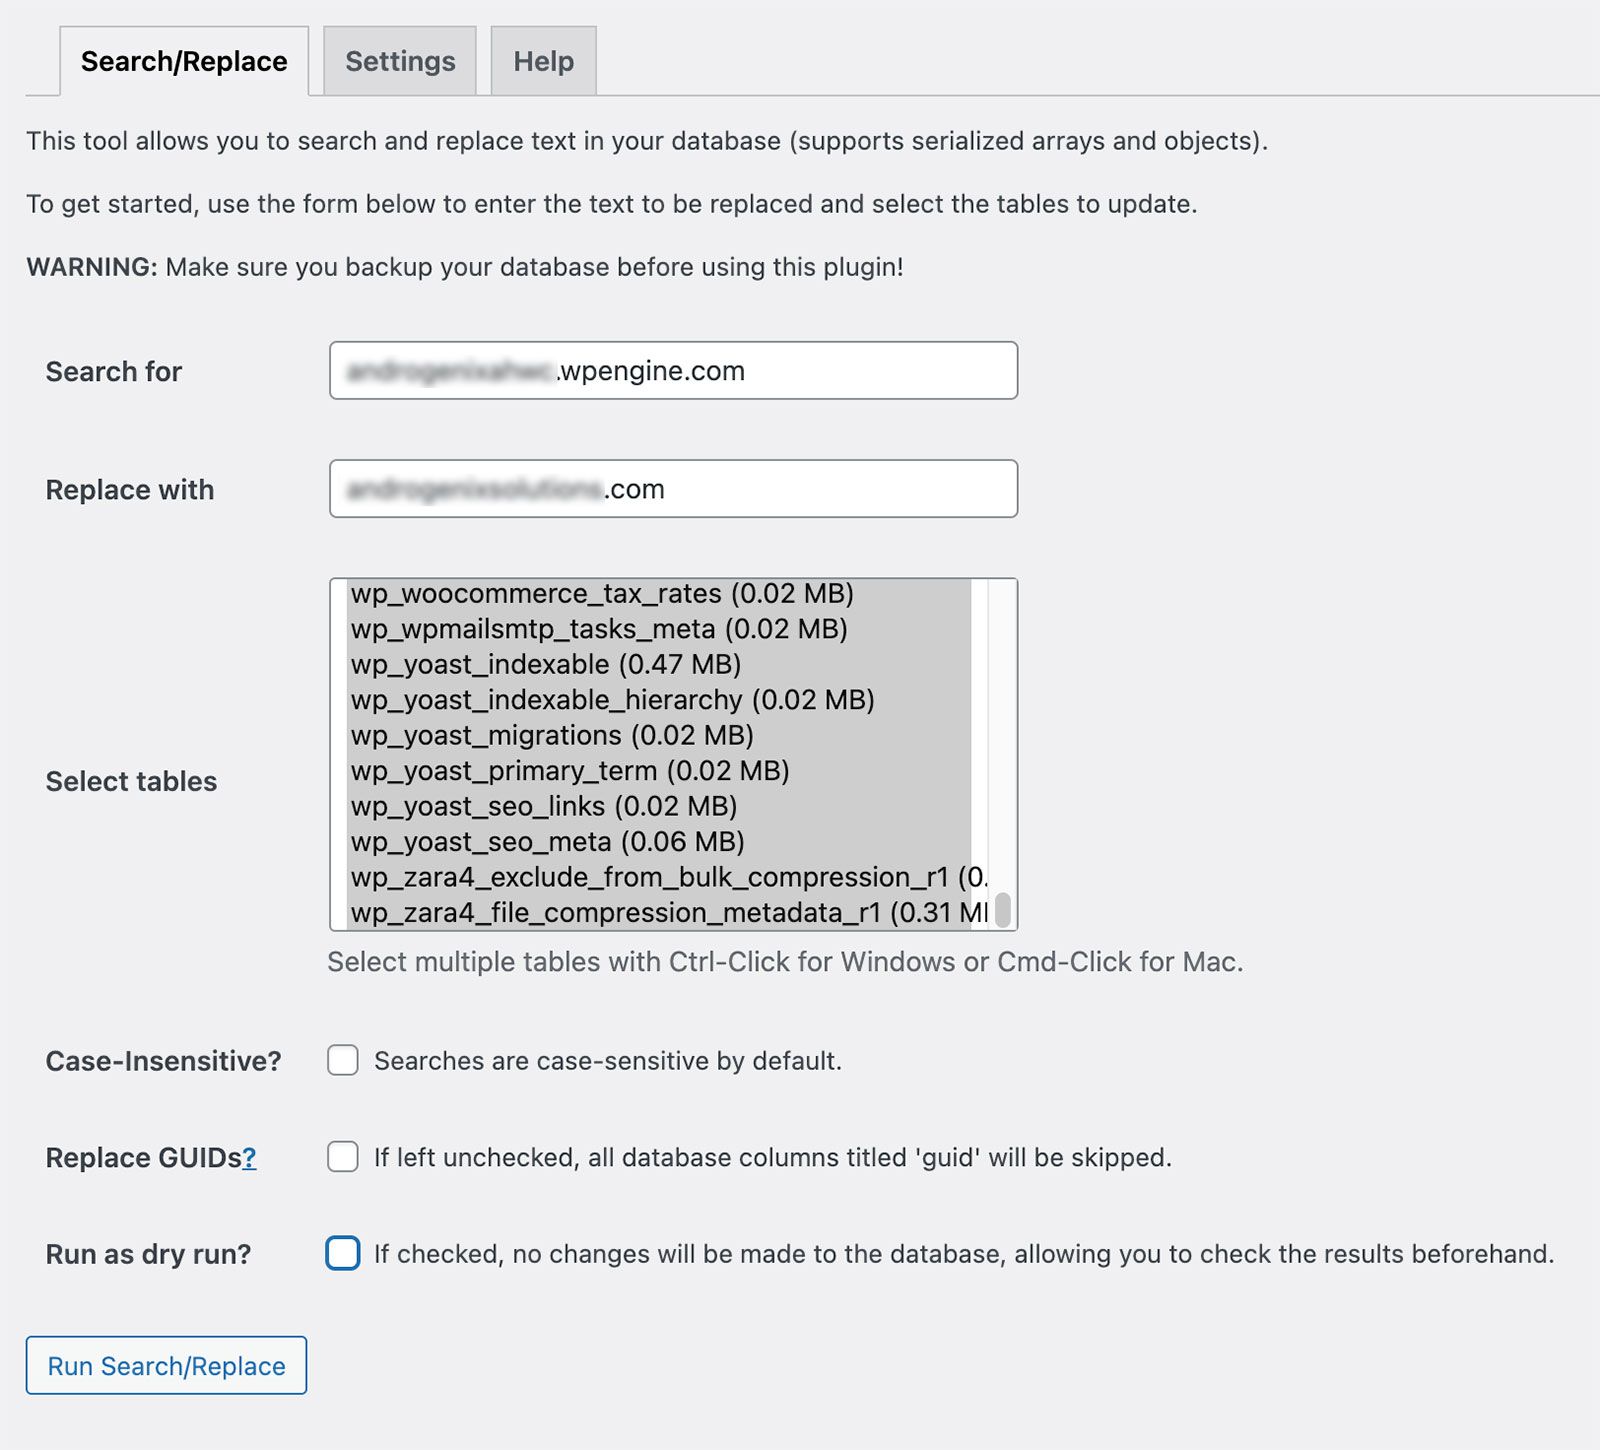
Update URLs
Install & activate the Better Search Replace plugin and update the installname.wpengine.com to yourdomainname.com
Set Primary Domain
Set your primary domain (non-www or www URL) & redirect the secondary domains to the primary URL. If you do this step too soon in the process, it can set your site into a permanent redirect state.
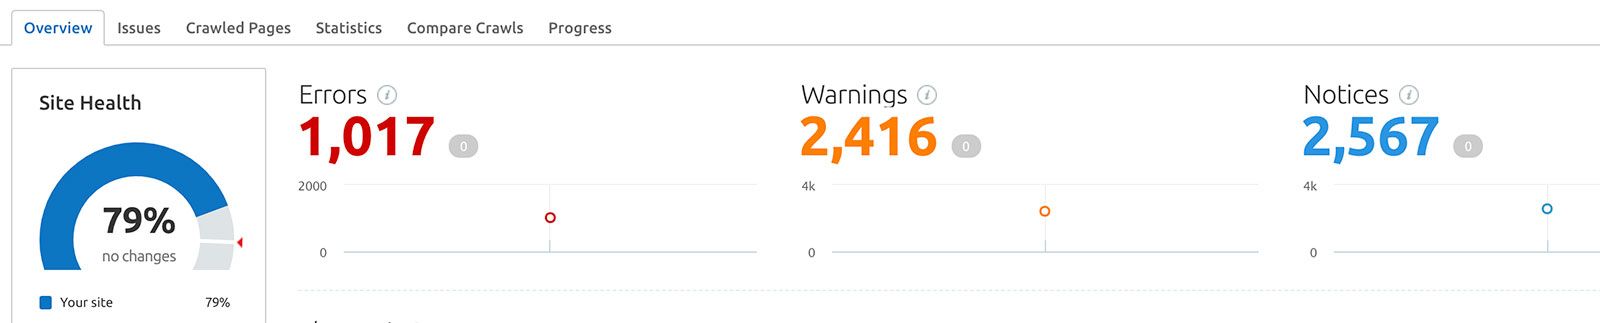
Scan for Errors
Scan your website for errors. I recommend using Screaming Frog or a SEMrush Audit.

WPE to WPE migrations
If you are migrating WPE to WPE, you will need to talk to tech support (Chat) and have:
- Migrate the website to your new WPE account.
- Have both Support PINs, or
- Add wpe-verification=installationNAME as a TXT record in your DNS
This way, they can remove the old domain so you can add the URL to the new account.
I hope you found this useful; please contact me if you need any help migrating your website to WPengine.
FAQ
What is WPEngine?