
This guide will help you set up your Unifi Solarpoint system quickly and conveniently. We’ll walk you through the process from start to finish, giving you everything that we know about this product so that you can make an informed decision about purchasing one for yourself. If something doesn’t work or is missing from this guide, please get in touch with our customer service team, and they’ll be happy to answer any questions!
I decided on a solar setup for my shed because of a lack of available electricity or WiFi and added security to monitor the area.
How to set up an Unifi Solarpoint System
The Unifi SolarPoint is one of the newest products from Ubiquiti Networks. It’s a snap-together kit with an easy installation process that only takes about 20 minutes if you’re following this guide. Let’s get started!
What You’ll Need:
- Unifi Solarpoint
- 100w Solar Panel
- 24v battery (or two 12v batteries in series to create 24v)
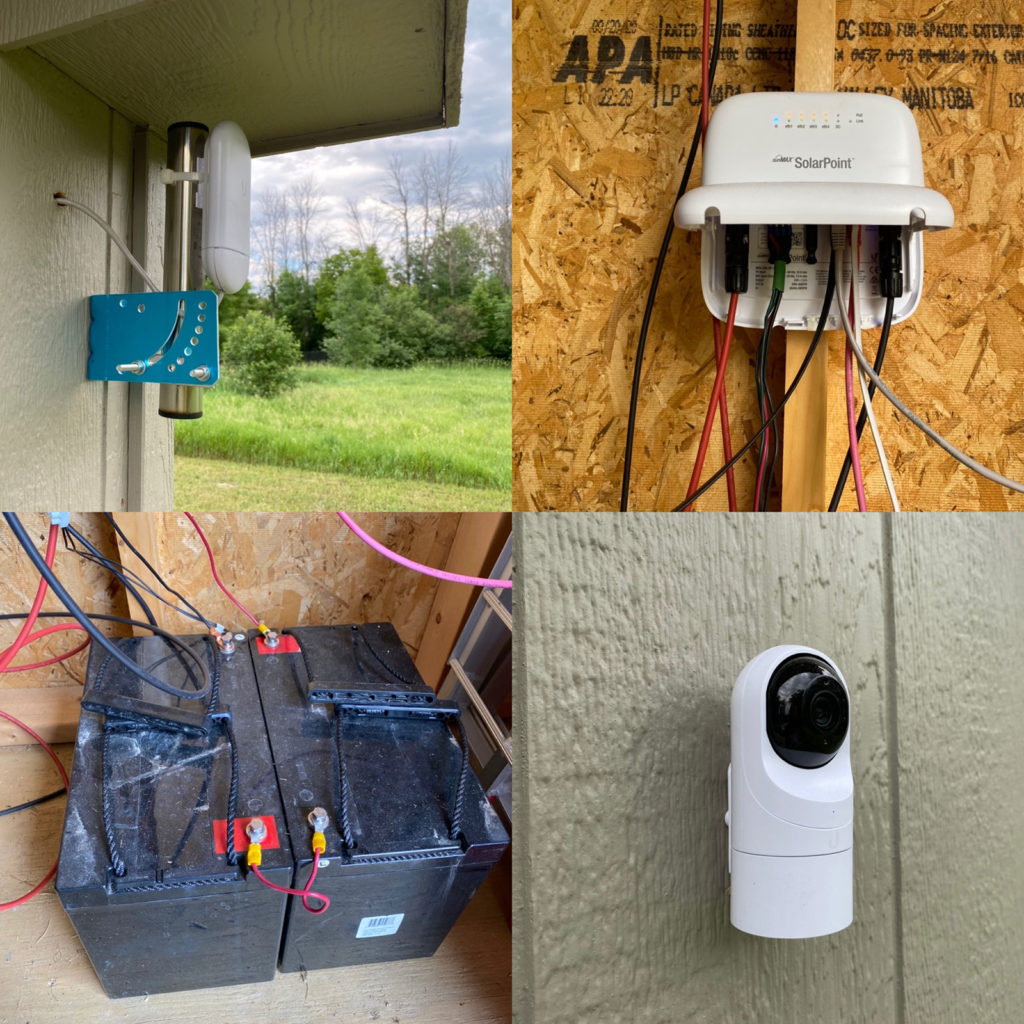
My Setup:
The most challenging part for me was finding what was compatible with Unifi devices and calculating the acceptable wattage draw to last through winter months at my longitude and latitude.
Unifi
- Unifi SunMAX SolarPoint (SM-SP-40)
- Two Unifi G3 Flex Cameras (UVC-G3-FLEX)
- Unifi Access Point Mesh (UAP-AC-M)
- Ubiquiti Nanostation (NS-5AC)
- Unifi airMAX NanoStation 5AC Loco (Loco5AC)
- Unifi Ethernet Surge Protector (ETH-SP-G2)
- Optional: Unifi Switch Flex Mini (USW-Flex-Mini) This allowed me to run several devices outside my house using only one ethernet cord.
Solar
- Four Renogy 100w Solar Panels
- Two 12v 100ah AGM Batteries (UB12100)
- Renogy Extension Cable (if you select an open-ended cable, remember to purchase an MC4 Male/Female Solar Panel Cable Connectors with assembly tool + Solar Crimper)
- Renogy Solar Panel Mounting Z Bracket
- Renogy Cable Entry Housing
- Solar Branch Connectors (4-to-1 cable) – In Parrarel (not in Series, In Series could overload the SolarPoint)
Other
- Four Ethernet Cables
- Two Pole Mount Bracket to Wall (to mount the Nano stations)
- Wire + Terminal connectors
- Silicone (to seal the holes)
Installation
Installation is pretty simple and straightforward, it’s a plug-and-play system, but there are a few key considerations.
- You need to install the thermostat wire to the negative connection, or the device will not work.
- Do NOT leave the Solar Panels connected without the batteries connected (I learned that the tough way)
- To bridge the Nano Stations, connect them first inside your house on your home network. The Loco only runs on 24v, use the adapter it comes with to power it before using it on the SolarPoint.
If you prefer a video set-by-step guide, I highly recommend CrossTalkSolutions tutorial:
Connecting the wires
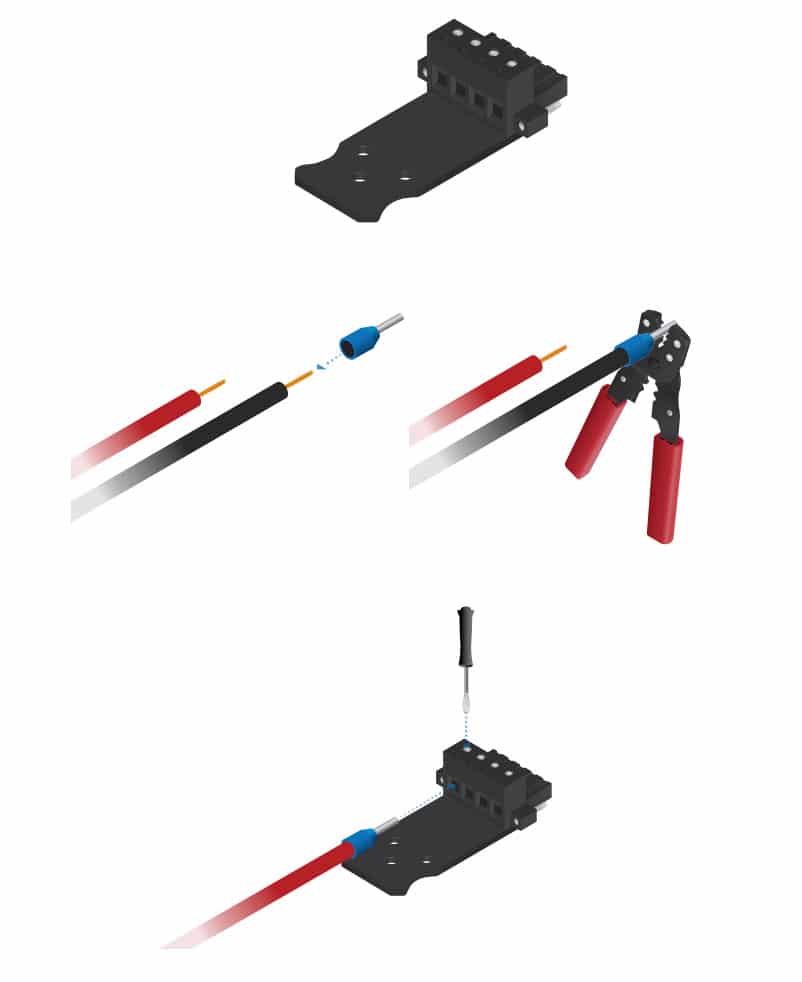
- Remove the four-pin connector from the battery terminal block.
- Crimp a ferrule on one end of the wire
- Insert the crimped wire into the appropriate slot on the four-pin connector
- Repeat these steps until the connector is fully occupied with all four wires
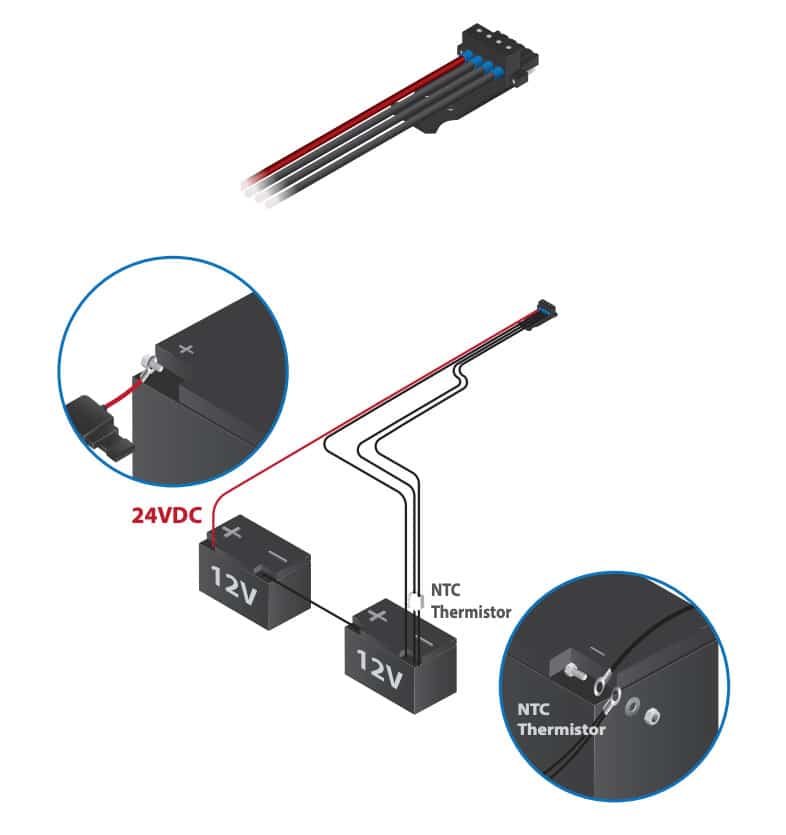
- Connect the NTC Thermistor to the battery
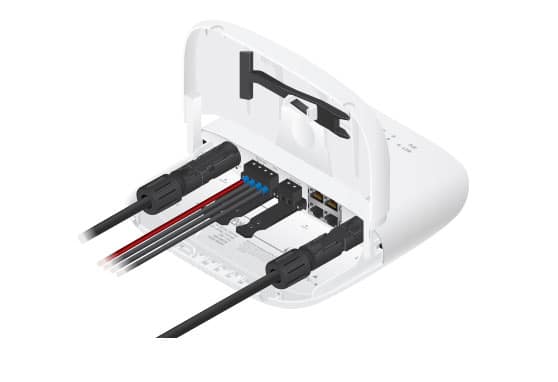
- Connect the four-pin connector to the SolarPoint
- Attach the Solar Panel (PV) cables
- Connect the Ethernet cables (these are disabled by default and can be turned on in the UI.)
A step-by-step PDF installation guide can be found here: https://dl.ubnt.com/qsg/sm-sp-40
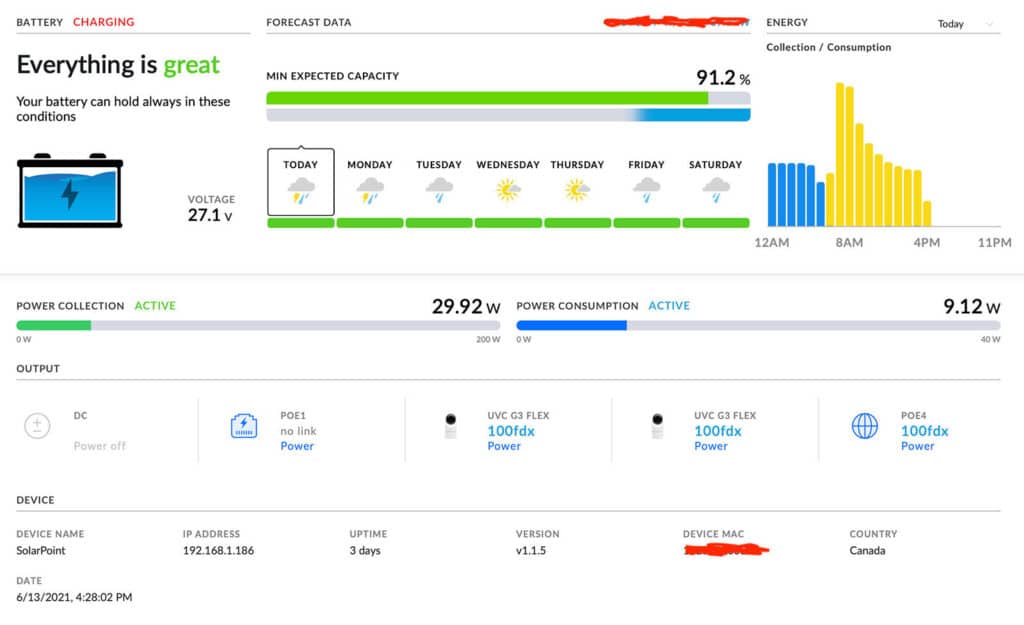
How to connect to a SolarPoint
You can use the Unifi Network App to find the SolarPoint IP address; this will be found under the Clients tab within the app.
Alternatively, you can connect to the default fallback ports:
Ethernet: 192.168.1.20 (you will need to be connected to the LAN via Ethernet)
WiFi: 192.168.153.1 (you will need to connect to the SolarPoint WiFi using the credentials within the box)
How to bridge NanoStations
- Connect the Nanostations to your network
- Have them in close proximity, pointed at each other
- Download and install the UISP app
- In the app, under Configuration, turn on PtP Mode on both devices.
- By using a web browser on the same network, you can accomplish the same by entering 192.168.1.20 as the URL to gain access to the radio’s management console. You will have to accept and dismiss the SSL certificate warning.
- Enter ubnt as the administration account and ubnt as the password.
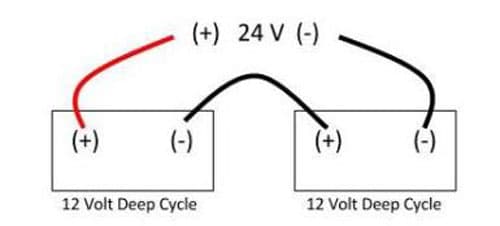
How to Make two 12-Volt Batteries into 24 Volts
You will need to connect the 12v batteries into a series to create 24v. You can see an example below. This is accomplished by added a connection between the positive and negative terminals.
After everything has been assembled, you will want to do some cable management and check the NanoStation alignment. If you have any questions, please feel free to contact me.